Settings
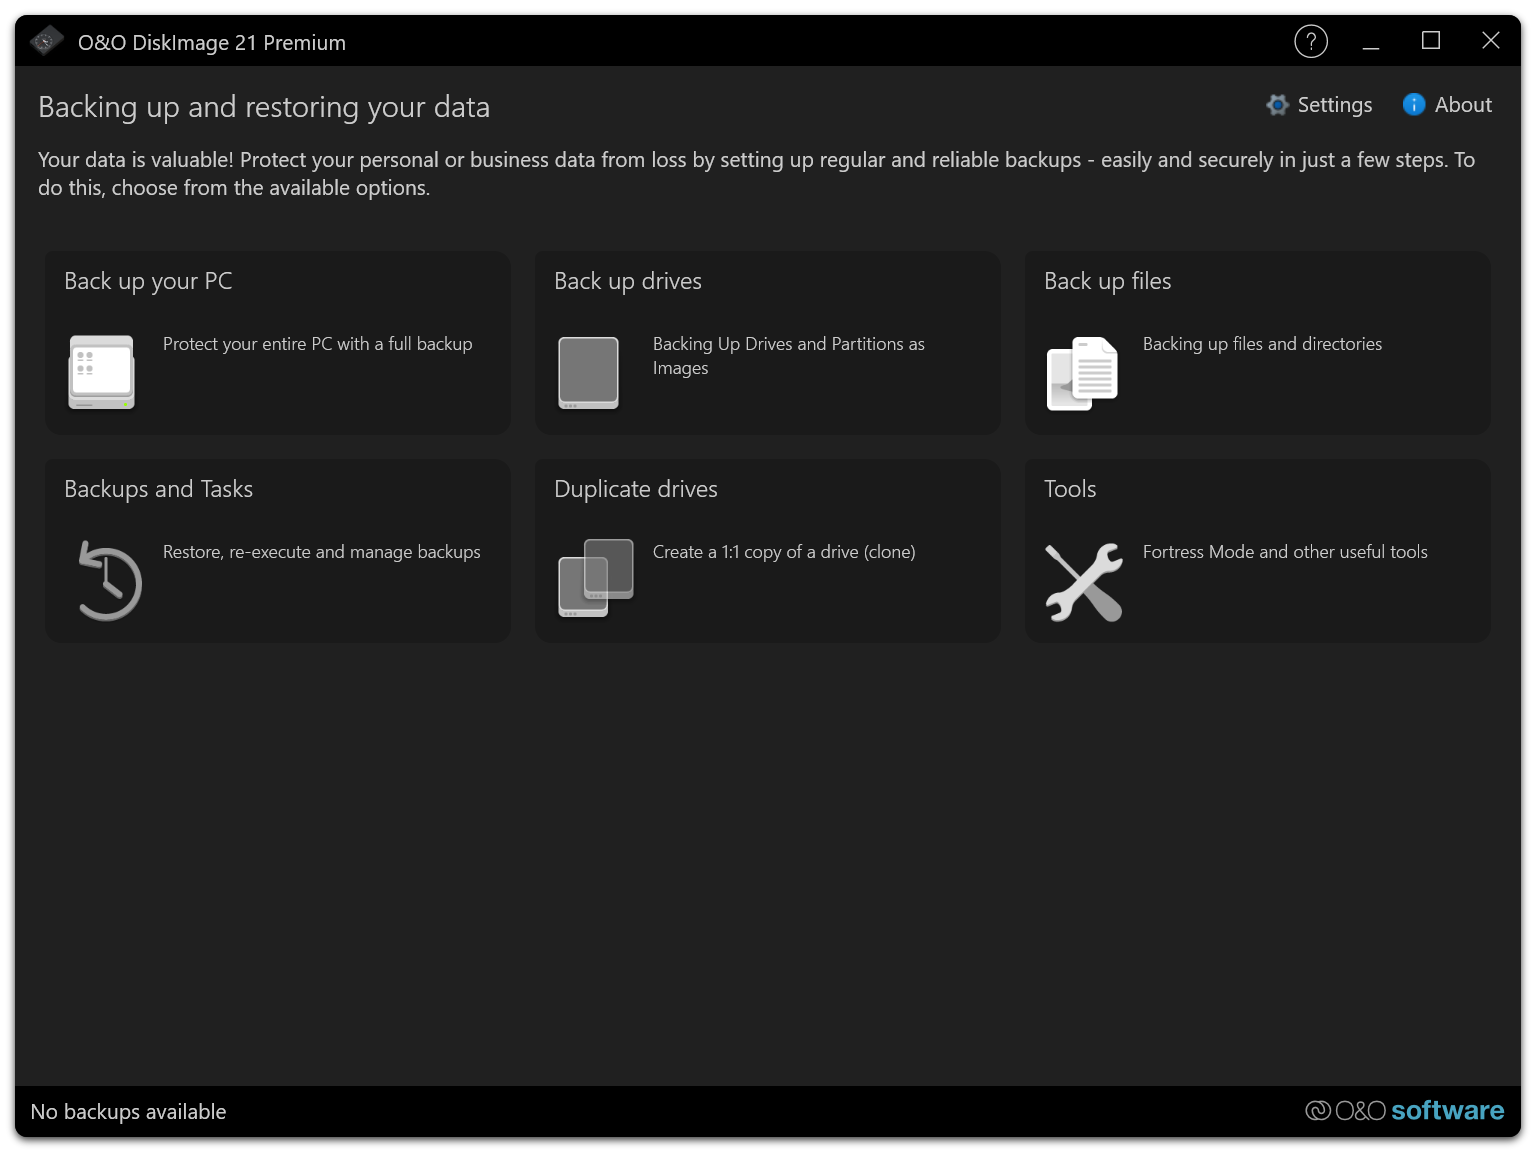
In the Settings of O&O DiskImage Premium you can configure the software according to your personal needs and preferences.
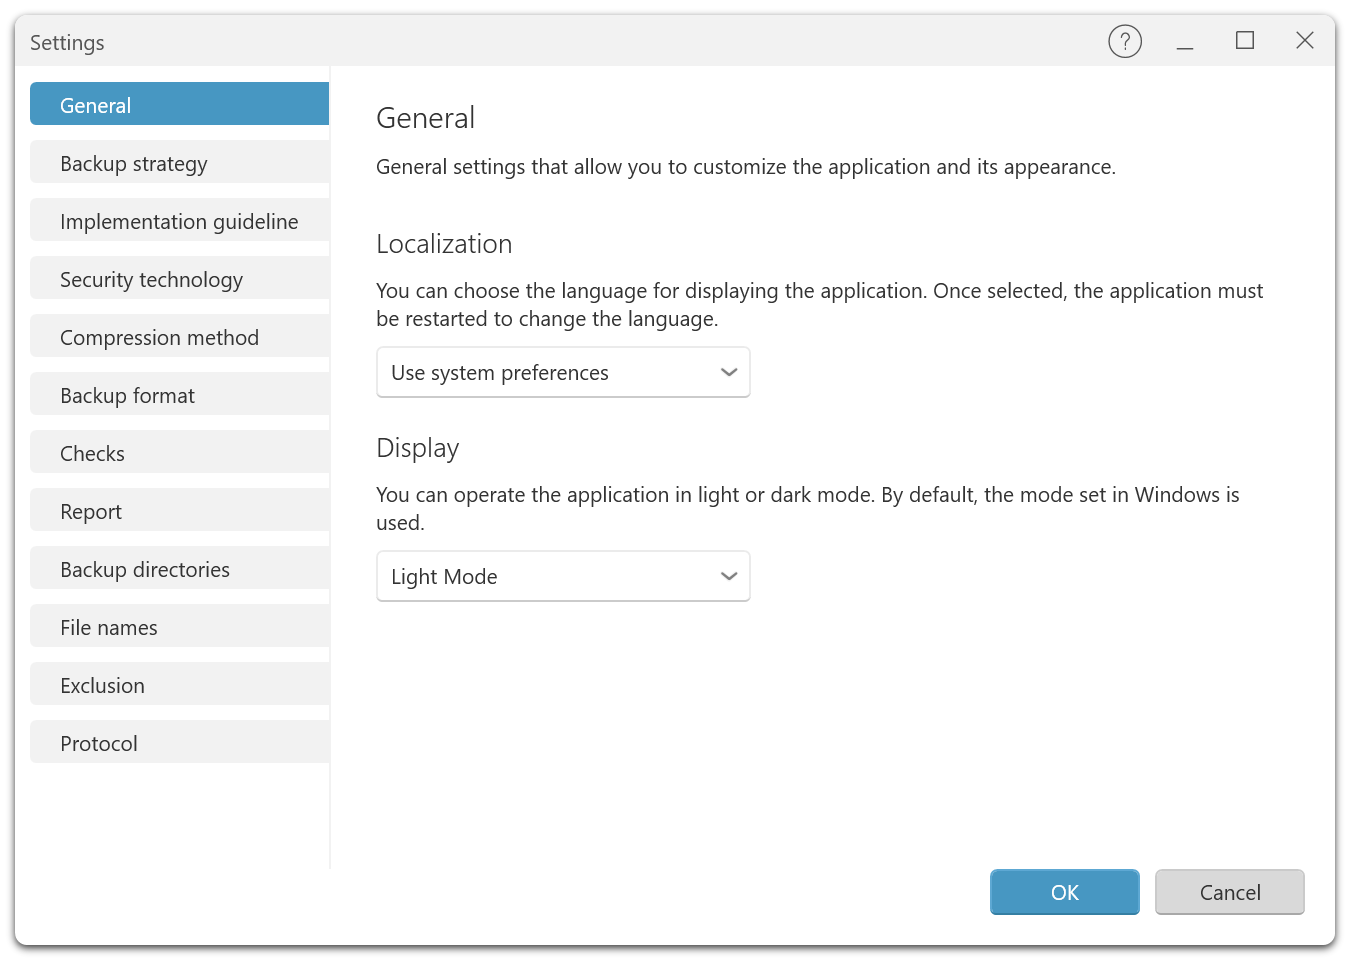
General
Localization
Set the language of the user interface according to your requirements. Available are: German (DE) - English (EN) - French (FR) - Spanish (SP) - Italian (IT) - Russian (RUS) - Japanese (JAP) - Chinese (CH)
Select your preferred language to ensure that all menus, dialogs and help texts are displayed in the selected language.
Display mode
Adapt the visual appearance of the application to your visual preferences or work environment:
Bright mode: Selects a light color scheme for the user interface, ideal for bright work environments.
Dark Mode: Enables a dark color scheme that is particularly easy on the eyes in dark environments or at night.
System Settings: Automatically adjusts the color scheme to match your operating system settings.
Choose the mode that best suits your current environment or preferences. This can help reduce eye fatigue during prolonged use and makes working with the software more comfortable.
Backup Strategy
Choosing the right backup strategy is crucial to meeting your data backup and recoverability needs. O&O DiskImage offers several strategies to choose from, depending on your data change frequency and storage needs.
Backup strategy options:
Full backup, then create incremental backups: Start with a full backup of your system or selected drives. After the initial full backup, only the changes since the last backup will be saved. This method saves disk space and reduces backup time, as only changes are captured after the first full backup.
Full backup, then create differential backups:
As with the first option, this strategy starts with a full backup, then creates differential backups that capture all changes since the last full backup. This option offers a good compromise between disk space requirements and speed of recovery, as each differential backup allows a full recovery to the point of the last backup.
- Only create full backups: This option creates a full copy of the selected data each time. This strategy uses the most disk space, but has the advantage that each backup file is independent and no other files are needed for recovery.
Note: It is recommended that you regularly review the storage requirements and efficiency of your chosen backup strategy and make adjustments as needed to ensure that your data is always effectively protected.
Execution Policies
The Execution Policies determine how backup cycles are handled in terms of full and differential (incremental or differential) backups. These settings are critical to automating the backup process and ensuring that your data is backed up regularly and efficiently.
Execution Policy Configuration:
- Full Backups After Differential Backups:
Determine after how many differential (incremental or differential) backups a full backup will be performed again. This helps minimize the risk of a long chain of incremental or differential backups increasing recovery time and complexity.
Setting Options:
Enable or disable this feature as needed. When enabled, full backups will be performed automatically after a set number of differential backups.
Selecting the number of change backups: Specify the exact number of change backups to be performed before initiating a new full backup.
Note: It is important to find a balance between the number of change backups and full backups to use storage space efficiently on the one hand and to ensure the security and speed of data recovery on the other.
By carefully configuring the execution policies, you can optimize the backup process and ensure that your backup strategy meets the needs of your company or personal data.
Backup technique
In the Backup technique settings of O&O DiskImage Premium, you can select which method is used to create images of your drives and data. Each technique offers different advantages that may be relevant depending on your security requirements and storage space needs.
Backup technique options:
- Used sectors:
This technique creates an image of the drives by copying only the sectors that are actually in use. This saves disk space and speeds up the backup process, as empty areas of the drive are ignored.
Forensic Backup: Forensic backup creates a complete image of the drive, including all currently unused but potentially recoverable data. This technique is particularly suitable for legal or investigative purposes, where it is important to extract every possible piece of information from the drive.
Direct Forensic Backup: This method is a specialized form of forensic backup that creates an even more detailed image. It must be performed in fortress mode, which includes additional security measures and protocols to ensure the integrity of the backed up data.
Note: Direct Forensic Backup can only be performed in fortress mode. Enable this mode under Tools before starting such a backup.
Compression Method
Setting the compression method in O&O DiskImage Premium allows you to save storage space by reducing the size of the backup files. You can choose whether to enable compression and select from various compression methods the one that best suits your needs.
Enable compression
Decide whether to enable compression for your backups. If compression is disabled, the data will be backed up in its original size. This can be faster but requires more storage space.
Selecting the compression method:
Lempel-Ziv algorithm (default): This is the default option that provides balanced compression without significantly affecting backup speed.
Lempel-Ziv algorithm (maximum): This option provides stronger compression that may take more time but further reduces the storage space required by the backup files.
ZIP Deflate Compression: A common and efficient compression method that is well supported and used in many applications.
BZIP Method (1K Block Size): Provides efficient compression with a smaller block size, which can be faster but may compress less than larger block sizes.
BZIP Method (4K Block Size): A middle ground between the 1K and 9K block sizes, offers a good balance between compression ratio and speed.
BZIP Method (9K Block Size): Provides the highest compression ratio among the BZIP options, ideal for maximum file size reduction at the expense of speed.
Note: Be aware that stronger compression may increase the duration of the backup and may use more of your system’s resources.
By carefully choosing the compression method, you can effectively manage the storage requirements of your backups and optimize the balance between storage requirements, speed and system resources.
Backup format
The choice of backup format affects how your data is stored and can affect compatibility with other systems and software. O&O DiskImage Premium offers various formats to meet different needs and preferences.
Available backup formats:
- O&O DiskImage format:
This is the default format of O&O DiskImage. It is specifically optimized for use with O&O DiskImage and offers the best performance and integration with the software’s features.
- Virtual Hard Disk format (VHD):
The VHD format is a disk image format developed by Microsoft that is used in various virtualization solutions. It enables compatibility with systems that use VHD for virtual machines or as a backup format.
- Virtual Hard Disk Extended format (VHDX):
VHDX is an extended version of the VHD format that offers larger storage capacities and improved error recovery technologies. This format is particularly suitable for use on more modern systems using Windows 8 and above.
Note: Make sure that the format you choose is compatible with your hardware and any systems on which you may need to access the backup files.
Verify backups
The Verify backups feature in O&O DiskImage Premium allows you to ensure the integrity of your backups by choosing whether to validate each backup after it has been completed. This is an important option to ensure the reliability and correctness of the stored data.
Validate backup after completion
You can choose to automatically validate each backup after it has been completed. This check ensures that the backup files are error-free and complete, which is especially important if the data is needed for critical applications or to recover from a data loss.
Time required: Please note that validation takes additional time. The duration depends on the size of the backup files and the performance of your system. It is an important investment in data security, but can lengthen the overall backup process.
Recommendation: It is recommended to enable validation for important backups, especially if the data is not regularly verified by other means. This can help identify potential problems early and increase the reliability of your data backup strategy.
Note: Consider whether validation should be performed for all types of backups or only those that are particularly critical to your data recovery strategy.
By enabling these checks, you can increase the confidence that your backups will work reliably and effectively when needed.
Report
The Report feature in O&O DiskImage Premium gives you the ability to get detailed reports on each backup operation. These reports can contain valuable information about the history and status of the backups, which is particularly useful for monitoring and documenting the success of the backup operations.
Create Report
When enabled, O&O DiskImage creates a detailed report after each backup, which includes important information such as the time of the backup, the files involved, the disk space used and any errors during the process. These reports are particularly useful for monitoring your backup processes and for troubleshooting.
Note: Think carefully about whether reports are necessary for your backup strategy. While they can provide valuable insight, they also increase the administrative effort and resources required.
By selectively enabling or disabling the report feature, you can ensure that you get the information you need without creating unnecessary system load.
Backup directories
Configuring backup directories is an important aspect of the data backup strategy in O&O DiskImage Premium. This setting allows you to determine where your backup files should be stored. You can specify multiple directories, which will then be considered by the system in descending order of available storage space. This ensures that storage space is used optimally and the backups are stored where the most space is available.
Managing backup directories:
- Adding directories:
Add additional directories in which your backups should be stored. This can be useful if you use multiple storage media or want to set up special areas for certain types of backups.
- Changing directories:
Change the path information of existing backup directories if necessary, for example if a drive has been replaced or the storage location has changed.
- Removing directories: Remove directories from the list that you no longer want to use for backups. This can happen if a storage medium is no longer available or required.
Note: Make sure the directories you select have enough storage space and are safely accessible to avoid data loss.
File names
The File names setting in O&O DiskImage Premium allows you to specify specific paths and file names for your backup files. This feature is particularly useful for improving the organization of your backup files and making them easier to identify. Using placeholders to dynamically generate file names can help to automatically name the backup files according to date, time or other specific criteria.
Storage path and file name configuration:
- Storage path:
Specify the exact path where your backup files should be saved. This can be a local folder, a network path or an external drive.
- File name:
Determine how your backup files should be named. You can use fixed names or use placeholders to generate dynamic names that are automatically adjusted. Placeholders can, for example, contain the current date, time or a sequential number to uniquely identify each backup.
- Preview: After you have specified the path and file name configuration, you can see a preview of the resulting file name. This helps you to check that the file name is formatted as desired and that all wildcards are resolved correctly.
Exclusion List
The Exclusion List in O&O DiskImage Premium is a helpful tool that allows you to specifically exclude certain files and directories from being backed up. This helps save storage space and ensures that only relevant data is included in your backups.
Using the Exclusion List:
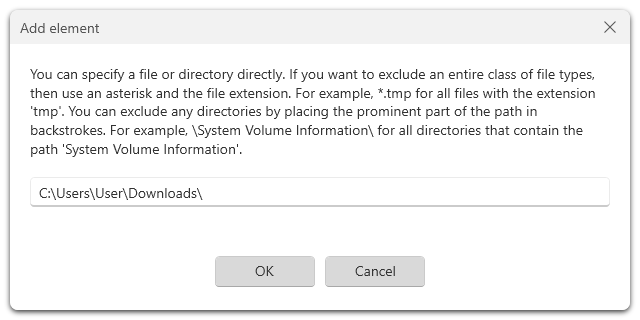
- Exclude files and directories:
You can add individual files or entire directories to the exclusion list to prevent them from being included in backups. This is particularly useful for temporary files, system caches, or media files that are already backed up elsewhere.
Configuring the Exclusion List:
Open O&O DiskImage and go to the Settings section.
Select Exclusion List from the menu.
Click on “+” to add a new entry.
Enter the full path of the file or directory you want to exclude.
Important: Paths to directories must end with a backslash (\), e.g.,C:\Temp\The entered paths will be added to the list and excluded from future backups.
To remove an entry, select it from the list and click “-”.
Examples of valid entries:
C:\Temp\→ Excludes the entire Temp directory on drive C
D:\Backup\alt.txt→ Excludes the file alt.txt on drive D
E:\Logs\→ Excludes all contents of the Logs directory on drive E
Note: Be careful not to exclude critical system or user data, as these will no longer be backed up.
Log
The log feature in O&O DiskImage Premium is an important tool for monitoring and analyzing your backup operations. Enabling logging allows you to keep detailed records of each backup performed, which is helpful for troubleshooting and optimizing backup processes.
Enable logging This feature allows you to create detailed logs of your backup processes. These logs record information such as the start and end time of the backup, files involved, size of the backups, and errors and warnings that occurred.
Benefits of logging:
Troubleshooting: The logs can provide valuable insight if problems occur during the backup. Error messages and warnings are recorded in the log and make it easier to diagnose and resolve problems.
Monitoring: Logs allow you to monitor the progress of your backup strategy and ensure that all scheduled backups are performed properly.
Documentation: Logs serve as documentary evidence that backups have been performed, which may be required in certain regulatory or operational environments.