File backup options
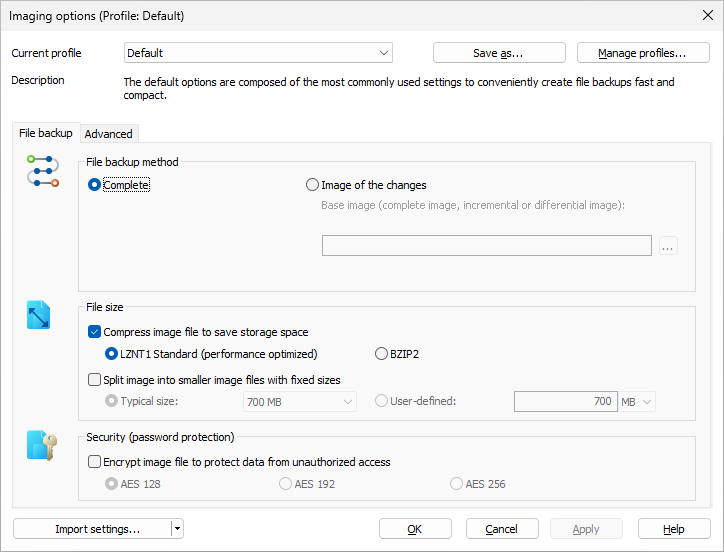
Under File operation /File backup options you can specify further settings that should be applied by default for the current or every new backup.
Encrypt a file backup
Your data can be securely encrypted using the recognized AES method . This permits O&O DiskImage to support extremely high security levels with a key length of up to 256 bits.
- You can select the level of encryption for your files under File operation/File backup options/Security.
- If you then start the imaging process (Start file backup), enter a password when being prompted.
You also have the option of encrypting the image after it's been created under Convert image file.
Imaging method for file backups
Under File operation/File backup options/File backup /File backup method you can specify which method should be preset for every file backup.
The options are:
- Complete
- Image of the changes
For normal use, we recommend the Complete method which is already set by default.
If you've already made one or more back ups of a folder or individual files, you can select the method Image of the changes. Only changes made since the last base image will be saved.
When creating an image of the changes, O&O DiskImage compares the data of the existing image with corresponding data from the current folder. That's why this backup method might require more time than the creation of a complete image. On the other hand, an image of the changes normally requires much less disk space than a complete image.
Advanced settings
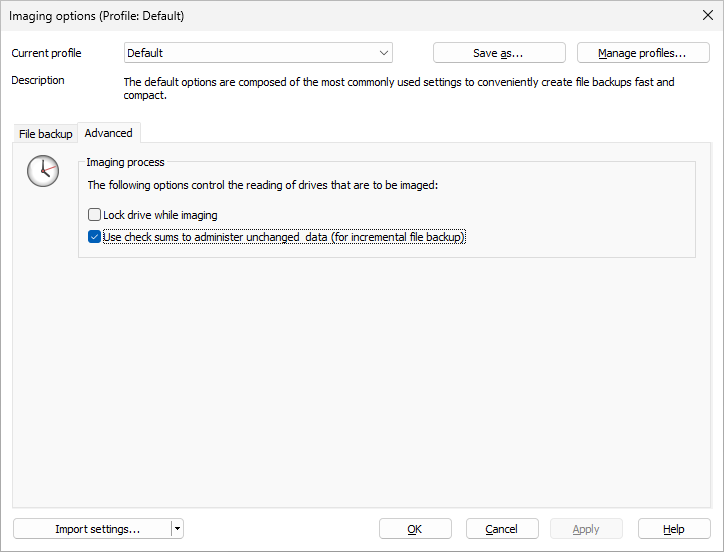
You can specify further settings under Advanced in the File backup options.
Lock drive while imaging
While processing a file backup, you can lock the drive where the folders/files being backed up are located. This prevents any changes from being made to the drive while the backup is being created. The drive will no longer be displayed in Explorer and all applications will be closed. The drive is not locked by default. If the drive is not locked, changes will be buffered either in the snapshot cache (if installed) or over the volume shadow copy service of Windows so that these changed won't influence the backup.
Use check sums to administer unchanged data (for incremental file backup)
Unchanged data is saved by default using checksums by the method Image of the changes. The file is slightly larger. It's therefore enough if you enter an existing image of the changes as source image for the next Image of the changes(with checksums). This function is enabled by default. If you save all images in a single folder, you can also disable this function. Your images will then take up less space on the disk.
- Make sure that the optionUse checksums to administer unchanged data under File operation/File backup options/Advanced is enabled.
Regulate the size of a file backup
A file backup can be split into multiple backup files. If one disk is not enough for storing a complete backup, you will automatically be asked to indicate a different storage location. It is also possible to manually set the maximum size of an file before. If the image being created is larger than the entered file size, additional image files will be created.
This function is especially useful when you plan to burn your image onto a CD/DVD at a later time. Sometimes a CD/DVD is not large enough to contain the entire image file. We recommend limiting image files to the size of the blank CD/DVD onto which you will be writing your images.
The image file can also be split at a later time using the Convert image file function. It is, however, recommended to split images at the time they are created to avoid any confusion that may arise.
- Under File operation/File backup options/File size/Split image into smaller image files with fixed sizes you can specify the size of individual image files.
Apply profiles for file backups
Under File operation/File backup options/Current profile you can reset the current settings to default for the image or select a wide ranging user-defined profile.
If you would like to save your user-defined settings, please follow these instructions:
- Enable your settings under Drive imaging/Imaging options.
- Select under Imaging options Save as....
- Give your newly created profile a name in the dialogue window and confirm.
- Under Manage profiles you can change or delete an existing profile.