Computer identity and drive check
Change the computer identity
You can change the identity of your computer to avoid authentication problems whenever the same computer identity is already being used within a network. This can be helpful whenever a system image is being rolled out onto several computers across a network, meaning a fully installed and configured Windows computer is transferred onto the drives of another computer.
Although this method does save time and effort compared to other kinds of duplication, there is a problem arising with each cloned system having the identical computer SID. This influences the security in working group environments. In addition, the security of transfer media might be inhibited in networks with many computer SIDs.
To avoid this problem, O&O DiskImage provides an option for changing the computer identity.
The SID can only be changed when you run O&O DiskImage from the bootable medium (Start CD) and not during normal Windows operation.
If an error occurs while changing the current computer SID, we recommend resetting the registration structures SECURITY and SAM.
- Under Tools click Change computer identity.
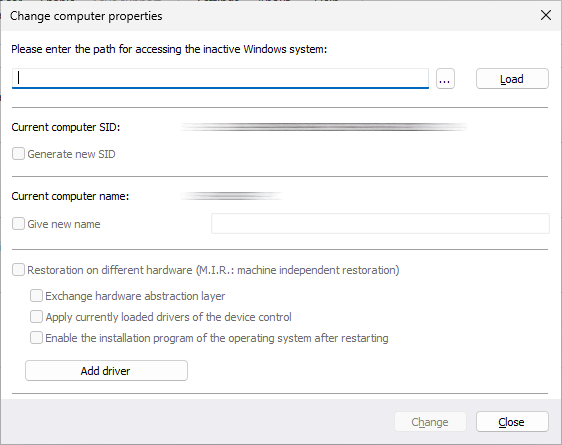
- Load the computer's non-active Windows system.The active system is the Windows PE being run on the bootable medium.This means that the non-active Windows system is the one not being booted by the hard disk.The path to the non-active Windows system is normally C:Windows.
- You should then enter a computer name for your computer (Give new name). Change saves your settings and the computer identity after you have changed them. Close cancels the dialog without applying any changes.
Check a drive
Under Tools the function Check drive for errors runs an intensive analysis of the file system and data storage interface to protect you against any possible loss of data.
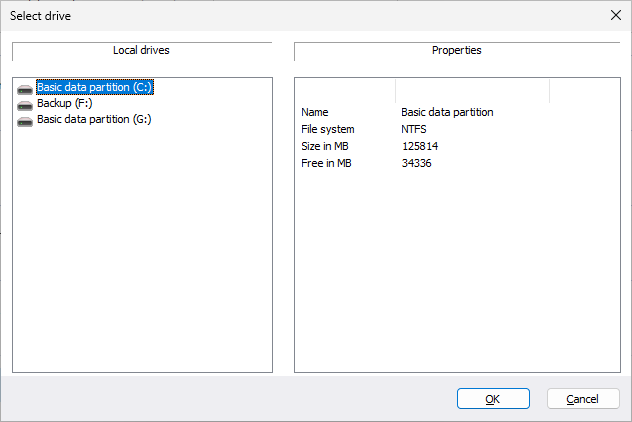
The Wizard (CheckDisk) will guide you step by step through the process of checking your drives. Simply follow the instructions in the dialog window and select your drive.
In the next stage the analysis is carried out. You can monitor progress by means of the progress bar where all the program status messages are listed.